Arisha's Inspiration Corner
A little blog to share crafts, recipes and ideas with you x
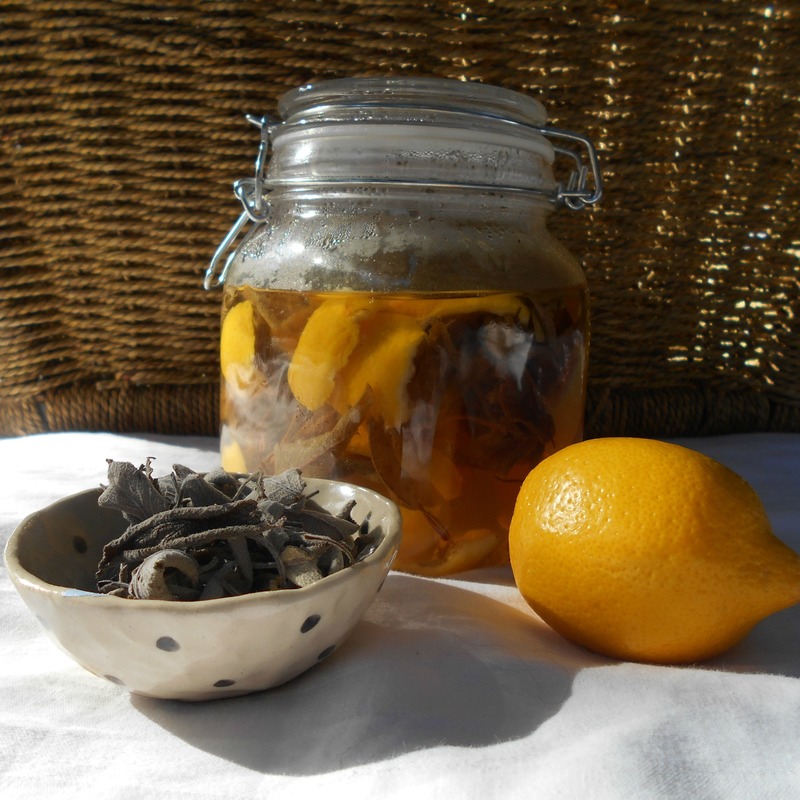
I have been intending to make some of this cleaning vinegar for ages now, and finally got some together, so I am sharing the recipe for all to enjoy! I used lemon and sage, but the combinations you could use are endless. Next time, I plan on trying orange and rose petal or lime and rosemary! This is such a gorgeous natural cleaner, that you can use all over your house, especially in the kitchen and bathroom. It is easy to make, cheap, natural and smells fantastic, plus you get that great feeling from making something wonderful and useful yourself!
WHAT YOU NEED: - Glass jar - White vinegar - citrus peel - Fresh herbs or flower petals WHAT TO DO: - First wash and dry your glass jar - Part fill the jar with your citrus peel and herbs (I have used lemon and sage) - Heat the white vinegar to almost boiling - Pour vinegar over lemon and sage and seal the jar - Place jar in a dark cool place for approx 24 hours ( longer if you want a stronger scent) - Strain the herbs and peels out and discard, put vinegar back into jar to store - To use simply wipe surfaces with equal parts water and vinegar mixture, or make up a spray bottle with 1/3 vinegar and 2/3 water for an all purpose cleaner!
0 Comments
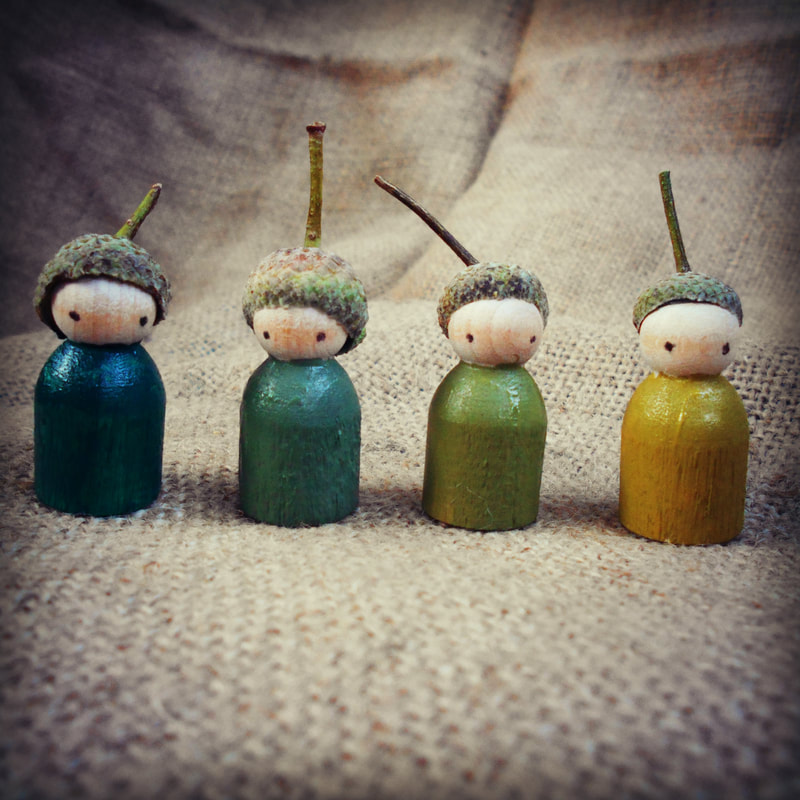
I love the concept of the nature table, to help children understand the turn of the seasons and the bounty of nature in all her abundance! I have created these little acorn peg dolls as we are just beginning to feel Autumn in the air here in the UK now, and I thought they would be grand for our little seasonal table, plus, well, any excuse to make wooden peg doll friends really! My daughter made these with me and she and her little brother have had hours of fun playing with them already! We painted ours in varying shades of green, but autumnal orange and brown colours would work well too.
WHAT YOU WILL NEED: - Some tiny wooden peg dolls approx 3cm tall ( I bought mine on ebay) - Acorn caps - acrylic paints - non toxic varnish - Hot glue gun WHAT TO DO: - Decide which dolls each acorn cap will go on and using the hot glue gun, put a generous blob of glue on the head and stick on the cap. Repeat till they are all done - Next, paint the bodies in acrylic paint of varying shades and paint on two little dots for eyes - Once dry, put on a coat of non toxic varnish- That's it!!! 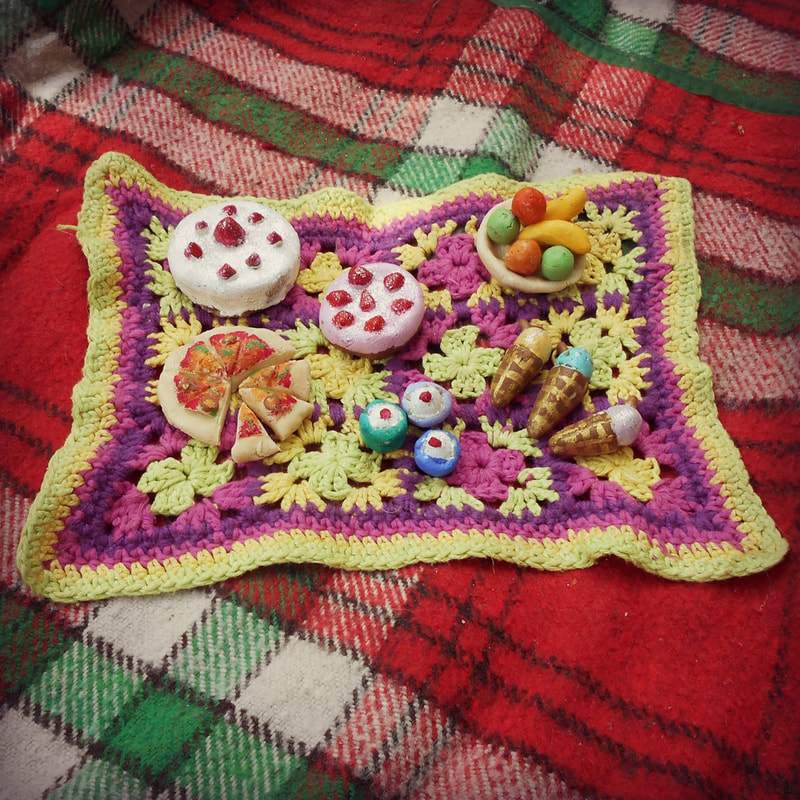
I confess, I think I had more fun making this than my children! There is something so soothing and timeless about rolling dough about in your hands and making shapes! My daughter and I had this idea about making a picnic feast for her Sylvanian families in the doll's house, and it came out so well, and was so much fun, I decided to share the idea here on my little blog.
So here is the recipe for the salt dough. We used white flour and cooking salt, which made a lovely soft and pliable dough. WHAT YOU NEED: - 2 cups flour - 1 cup salt - 3/4 cup water approx - acrylic paints - glitter - Non toxic varnish - Oven WHAT TO DO: - First to make your salt dough. Mix the flour, salt and water in a large bowl, till it forms a pliable dough. Add the water a little at a time. Add more water if need be. - Transfer your dough to a suitable surface (ie: table top or tray) - Make lots of fun and tiny dolly sized food - Put all creations on a baking tray and cook for approx 10-15 minutes at 200 degrees c - Take out and leave to cool - Paint using acrylics and decorate with a sprinkle of glitter if you wish! _ Lastly, once paint is dry, finish with a non toxic varnish - Perhaps crochet or sew a tiny picnic blanket and get the dolls out for a fabulous picnic! |

Arisha's Inspiration CornerHi there, I am Arisha. Thanks for stopping by my little corner of inspirations! I LOVE making things. This blog is a place for me to share with you, lots of lovely things to make and do including: Subscribe below to receive each new post hot off the press direct to your email!
Archives
April 2019
Categories
|
 RSS Feed
