Arisha's Inspiration Corner
A little blog to share crafts, recipes and ideas with you x
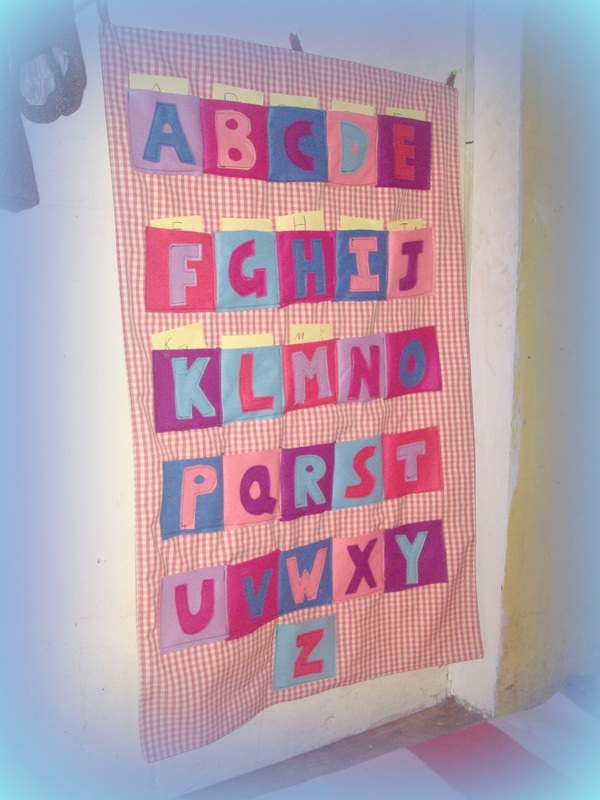
My daughter is very excited about learning to read. She can't wait till she can curl up with whichever book she fancies and read every word! We haven't pushed her to begin reading till she was ready, and that time has definitely come! To help make the process a bit more fun, I decided to make her this alphabet pocket wall chart. The idea is that she/we can draw pictures of things that begin with each letter and put it in the correct pocket, or even put actual things that begin with each letter in the pockets, if they are small enough! This way she can make the letter associations more visual and hopefully remember them better! I made this using a sewing machine, but you could easily sew this by hand too, and even stick the letters onto the pockets with fabric glue if you wanted.
WHAT YOU NEED: - 7 pieces of coloured craft felt ( the squares you get in craft shops) - Large piece of thick fabric for back, mine measures 22 x 34 inches (Or 2 thin pieces sewn together) - Small length of ribbon (Approx 9 inches) -Thread WHAT TO DO: - Cut out 26 squares of felt in a variety of colours approx 4 x 4 inches each - Cut out each alphabet letter from a contrasting colour to the background squares - Carefully sew or glue each letter to it's square and place in order in rows of 5 - Sew the letter squares together in rows of five with the Z square separate - If you have one thick piece of fabric for the back, then hem round the edges, if you have 2 thinner pieces, then sew them together inside out leaving a small gap to turn the right way round. Stitch gap closed once it is right sides out. - Take your background piece of fabric and arrange and pin the rows evenly spaced with the Z at the very bottom. - Sew each row on as if it were one long pocket, then sew in between each letter, making sure to leave the top of the pockets open - Sew the Z pocket on at the bottom - Cut your ribbon into 3 pieces and make into 3 loops - Sew the ribbon loops on securely at the top of your big fabric, one at each side and one in the middle. - Cut lots of little pieces of paper or card and have fun with your little one drawing things which begin with each letter to put into the pockets 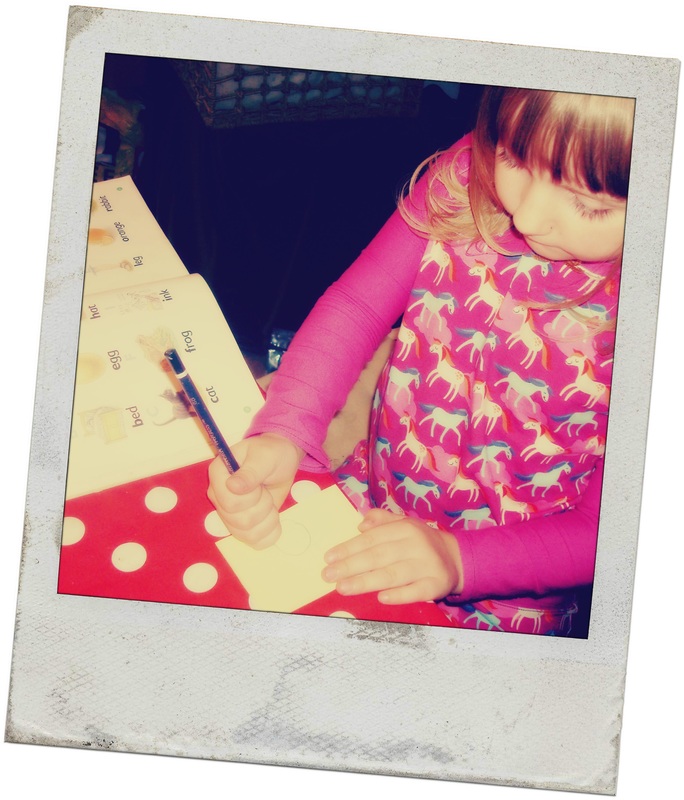

33 Comments
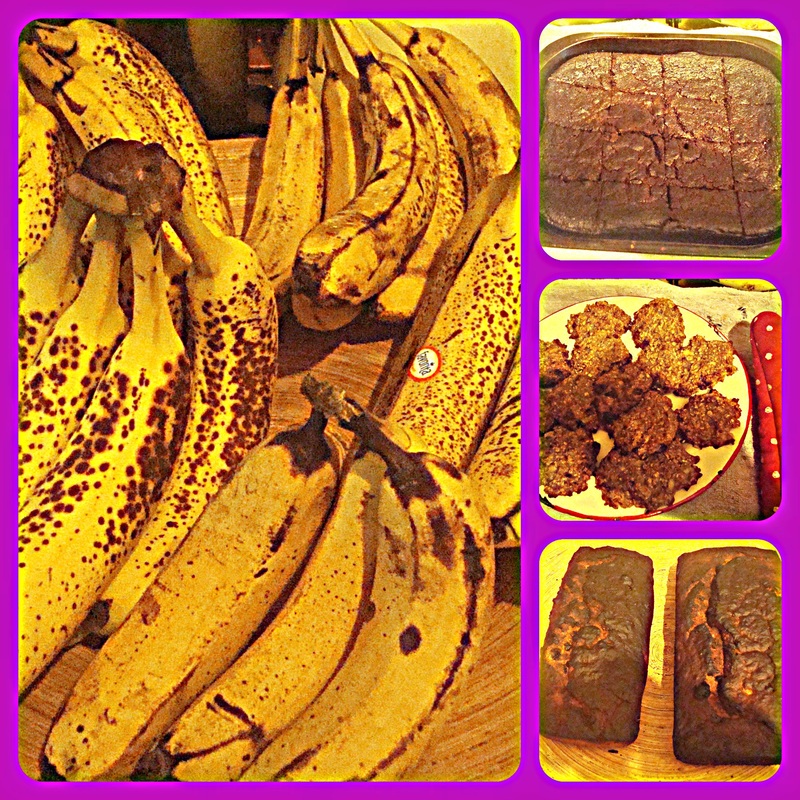
We were gifted several bunches of bananas by a friend yesterday, so today I have had a bananarama baking sesh! I made chocolate banana brownies, oaty banana bites and banana loaves. So without further ado, here are the recipes.
CHOCOLATE BANANA BROWNIES WHAT YOU WILL NEED: - 6 tblsp butter - 3/4 cup chopped dark choc - 2 ripe bananas -1 tsp vanilla extract - 1/2 cup honey - 1 tsp baking powder - 1 egg - 1/4 cup cocoa - 1 cup spelt flour WHAT TO DO: - Preheat your oven to 200 degrees c - Gently heat the butter and dark choc in a small saucepan over a low heat till melted, stirring constantly, then set aside to cool - In a bowl, mix the flour, cocoa and baking powder. - In a separate bowl, mash bananas, honey, vanilla and egg - Add butter and choc mix to banana mix and blend together - Add wet ingredients to dry and mix all together - Pour batter into a greased tin and bake for approx 20 minutes. You want it to be slightly gooey. - Leave to cool then cut into slices and enjoy with a cuppa! OATY BANANA BITES WHAT YOU WILL NEED: -5 ripe bananas -1 1/2 cups oats WHAT TO DO: - Preheat oven at 200 degrees c - Mash bananas in a bowl - Mix in oats - Form into flattish cookie shapes on a greased baking tray - Bake for approx 15 mins BANANA LOAF WHAT YOU WILL NEED: - 3 bananas - 3/4 cup honey - 1/4 cup coconut oil - 1 egg - 1 3/4 cup spelt flour - 1 1/2 tsp baking powder - 1/4 tsp bicarb of soda - 3 tsp cinnamon - 1/2 cup sultanas - 1/2 cup chopped pecans or walnuts WHAT TO DO: - Preheat your oven to 200 degrees c - Mash bananas in a large bowl - Add egg, honey and coconut oil to the bananas - Add rest of ingredients and mix well - Oil loaf tin with coconut oil and pour in mixture - Cook for approx 50 minutes or until a toothpick comes out clean - Allow to cool then turn out onto a cooling rack 
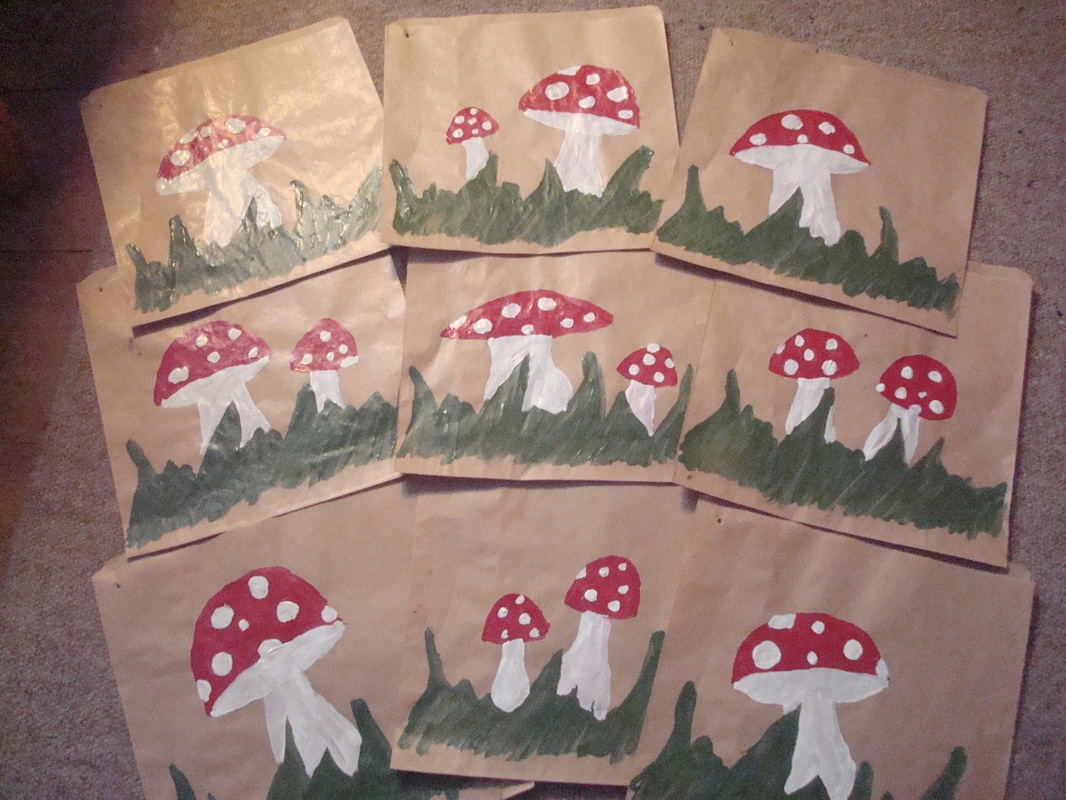
I don't usually do party bags for my kid's parties, but as my girl asked for a fairy craft party, I couldn't resist getting a bit crafty myself and painting these cute little toadstool themed party bags! You could paint anything, a skull and cross bones for a pirate party, glittery rainbow's, hearts and stars, the limit is your imagination! Everyone loved these and needless to say they were much cheaper and more eco than mass produced plastic ones.
WHAT YOU WILL NEED: - small paper bags - acrylic paint WHAT TO DO: - Decide on your theme and paint and glitter to your heart's content! 
|

Arisha's Inspiration CornerHi there, I am Arisha. Thanks for stopping by my little corner of inspirations! I LOVE making things. This blog is a place for me to share with you, lots of lovely things to make and do including: Subscribe below to receive each new post hot off the press direct to your email!
Archives
April 2019
Categories
|
 RSS Feed
